Project Objective:
O gauge, 5' x 10' table layout running 2 trains at the same time. All tracks connected for elaborate operation. 2 reverse loops and a siding. Outside loop is 48" for large locomotives. Old fashion Block control.
This layout will be built with track and ground cover only, customer will add structures once it is in place.
Planning the Track
These are the drawings for the initial track plan:
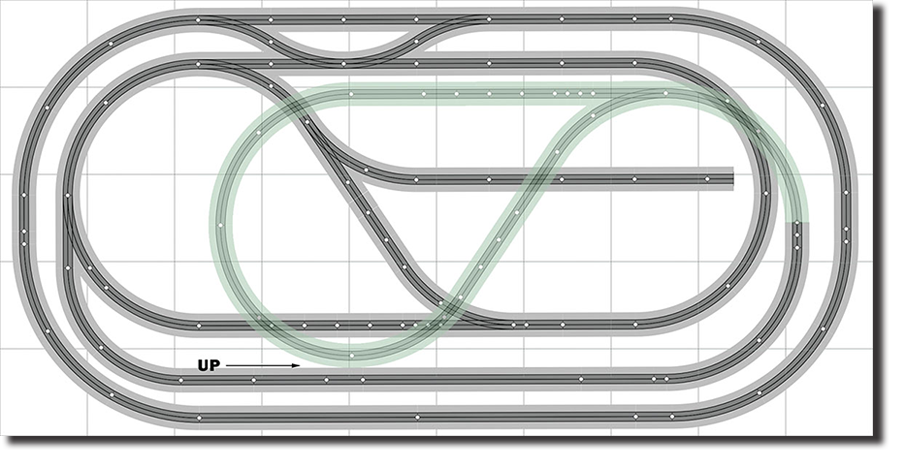
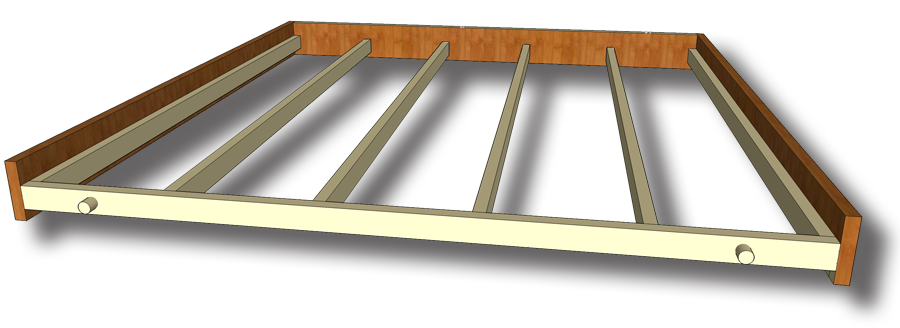
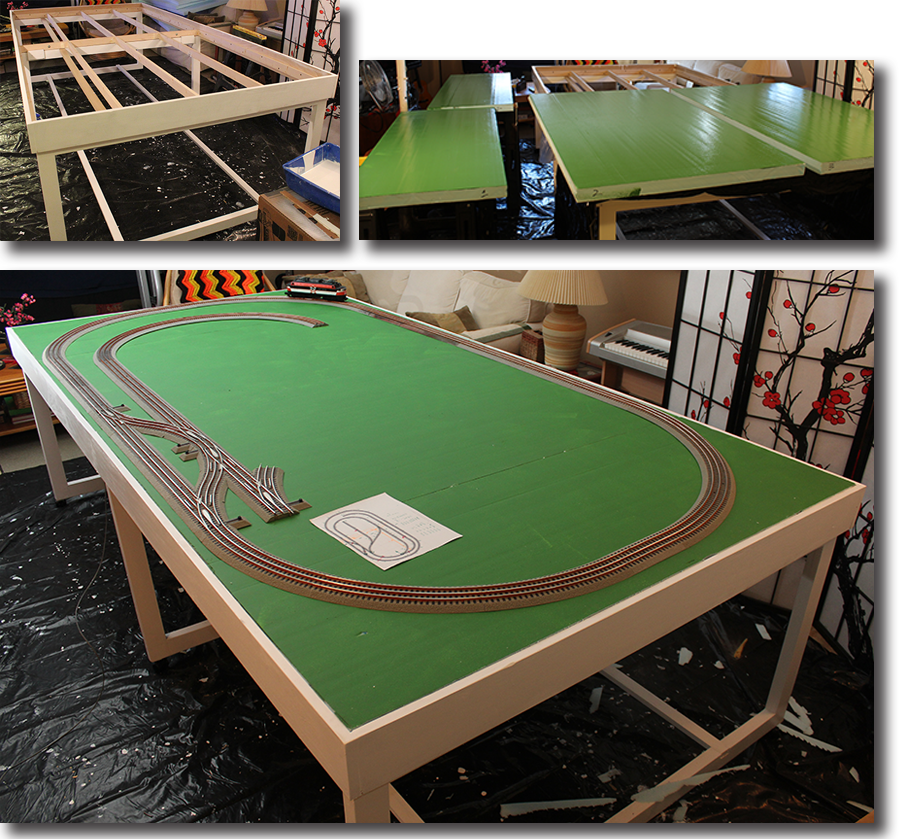
Table Design and Construction
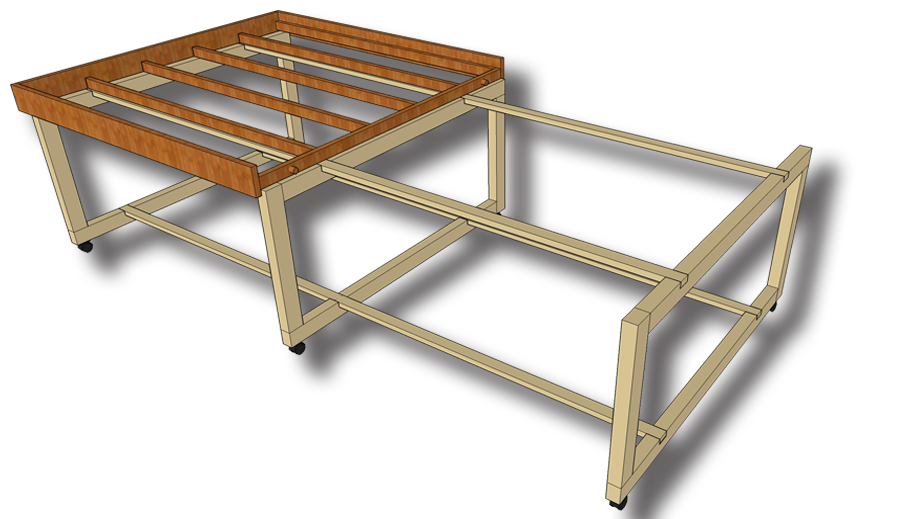
The table must be built for transportation and assembly on location. A 10' x 5' unit will not fit through the hallways so the table was designed as two 5' x 5' units and a separate leg assembly. The top sections are made from 3 solid wood outside panels and 3/4" plywood inside. The top area that is 2" deep will hold 2" insulating foam that will be the foundation for the track.
This is the design for one 5' x 5' unit:
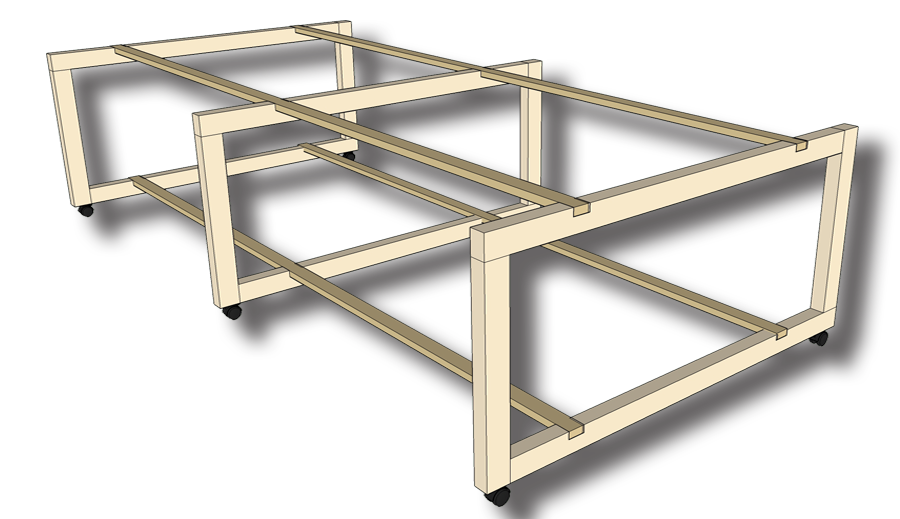
The legs are made from three 29" x 5' sections that are 3" side and 2" deep. The end sections fit inside the top unit and the the center section holds both top units in place. The three sections are connected by four 10' beams. The entire leg assembly is carried by six double wheel casters.
This is the design for the legs:
This is how one top unit fits on the legs assembly:
Track Weathering
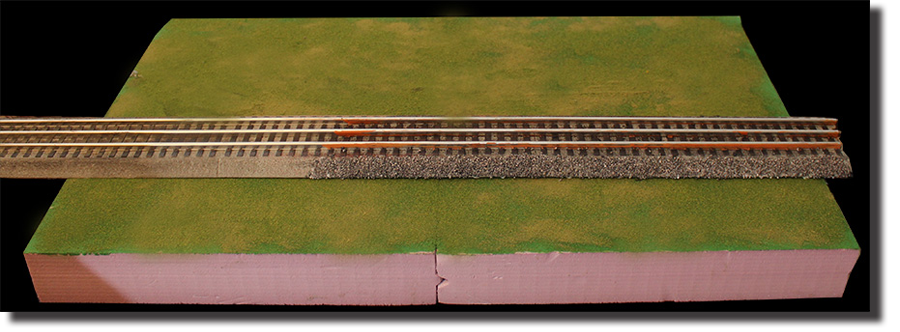
Lionel FasTrack is very toy looking out of the box. With some work and techniques we have developed we are able to give it a great look. The rail sides are painted with rust color paint, then we coat the roadbed angles with glue and sprinkle ballast to cover. The glue with the ballast will also attach the track to the foam base. Once it is all dry we go over the road bed with a black paint wash. The area on the right shows the first test we have done. We are testing different paints and glues to make the weathering durable.
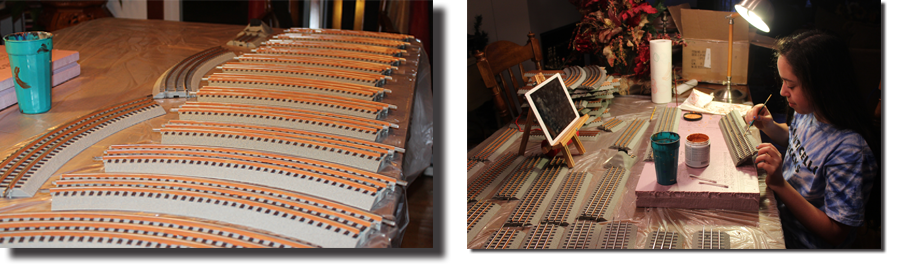
The first step in weathering the track is to apply rust color on the side of the rails. The selected color is a light rust color that will create a contrast to the dark ballast and ground covering, this will enhance the look of the layout. Below are images of the work done and of an apprentice that is becoming a master model builder and detail artist.
Once we have the table and foam in place we will set the track on the foam and apply the ballast to the track. This step will also affix the track to the foam. The track wiring will be done before the ballast is applied.
Table Painting and Assembly
The table has arrived from our carpenter's shop. It has been assembled and painted. The table frame is painted white. Next we paint the foam board green, this will be the base color under the ground cover that will be applied later. Once the paint is dry and the foam board is in place we start laying and testing the track.
As we layout the track we will start wiring the block sections and the general ground feeders.
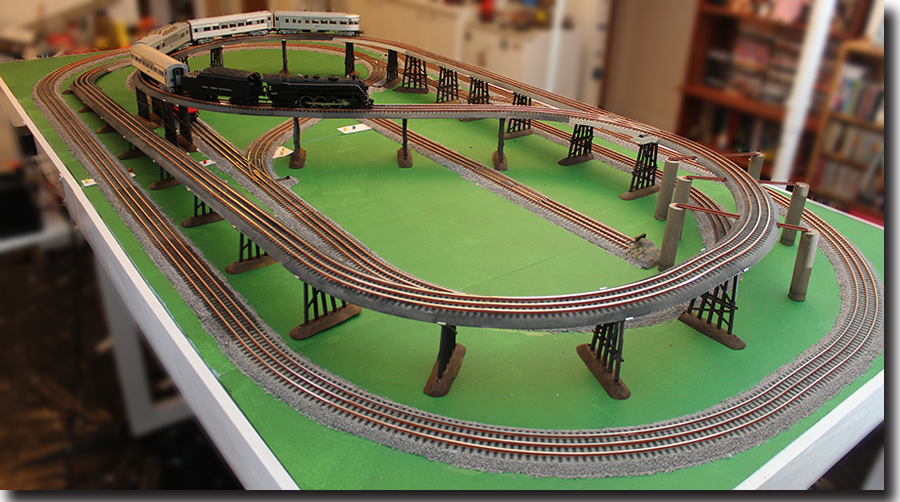
Track in Place
All the track has been placed and tested for clearances and operations. The next step is to start the wiring process. We like to power the switches directly from a power supply and not from the track, that will allow for route changes while the engines are not moving and will have the color signals always lite up. To do so we need to connect six wires to each switch.
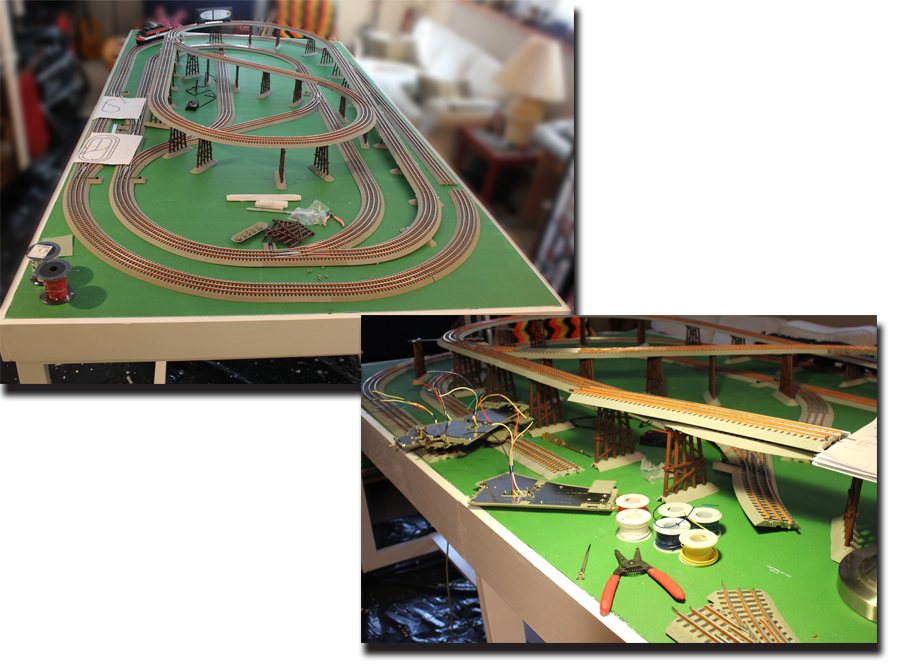
14 gauge power feeders are soldered to the track in several points along each block and connected below the table. The control panel shelve is in place and the wiring to the switch controls, block control and transformer begins.

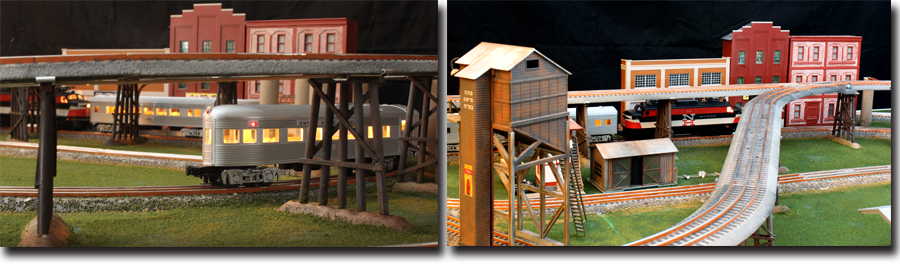
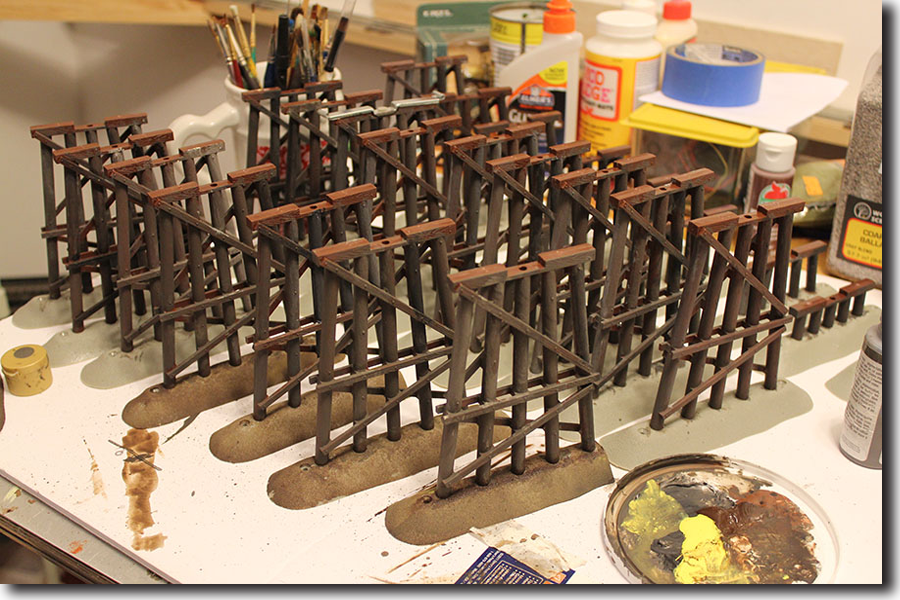
Painting the Trestle Bents
The trestle bets that are produced by Lionel are made in brown plastic, by applying some mixed colors, gray, black, white and brown we are able to achieve a look that is more interesting and natural.
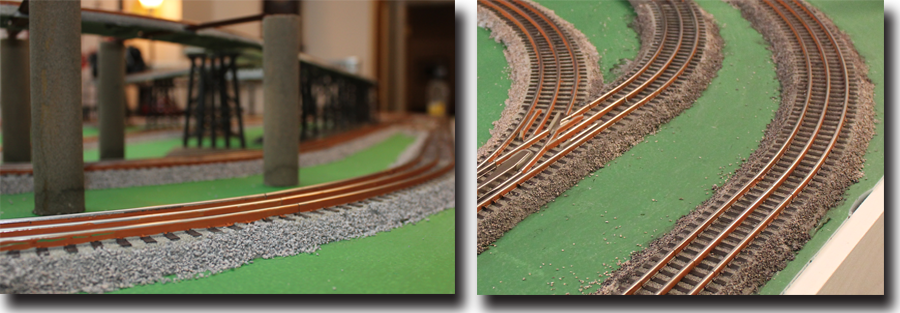
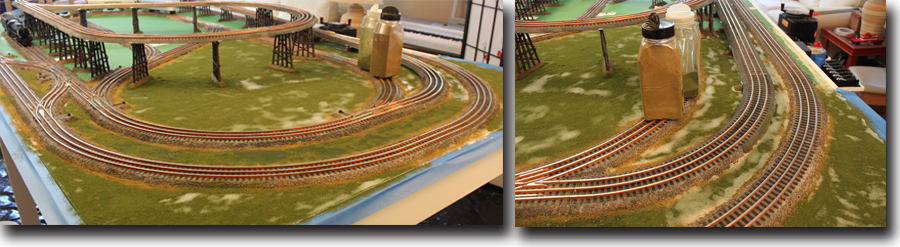
Track Ballast
The next step is to ballast the track. Glue is applied to the side angles of the FastTrack and ballast is sprinkled on. Once dry we apply a sealing layer of acrylic and a wash of diluted black paint. We also apply the black wash to the areas between the rack and between the track and the ballast. Below on the left is clean applied ballast and on the right the washed ballast.
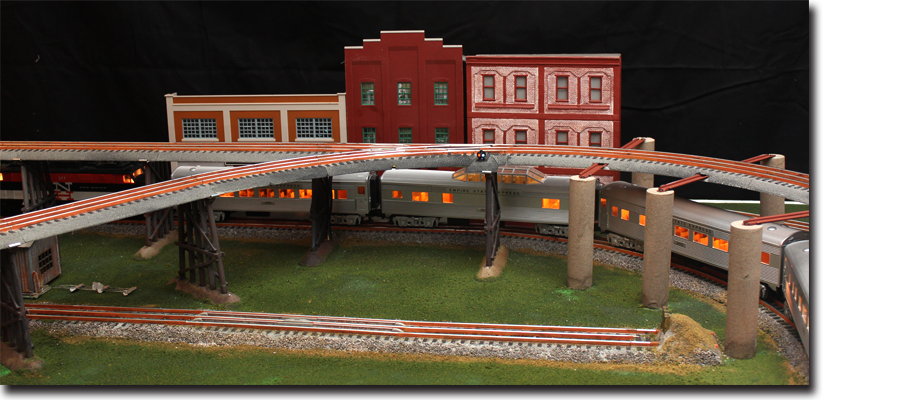
Here is a general view image of the layout so far, once the ballast is done and dry we will start applying the ground cover. On the left you can see three supports for the elevated track that are made from round columns and cross beams inserted in the track bases. This was done to ensure the clearance needed for the track that runs directly under the elevated track.
Ground Cover
For the ground cover we use Woodland Scenics Blended Turf. The sides of the roadbed are covered with Earth Blend and the rest with Green Blend. The Earth Blend creates a nice transition from the ballast to the green areas. When the glue dries we brush off the materials left on the track and ballast and seal the ground cover with an acrylic spray.
Solving Electrical Problems
The ramp to the elevated track section has been showing some issues with electrical connection so we applied solvent to secure the tracks together and soldered jumpers at all the connections to ensure electrical connections.

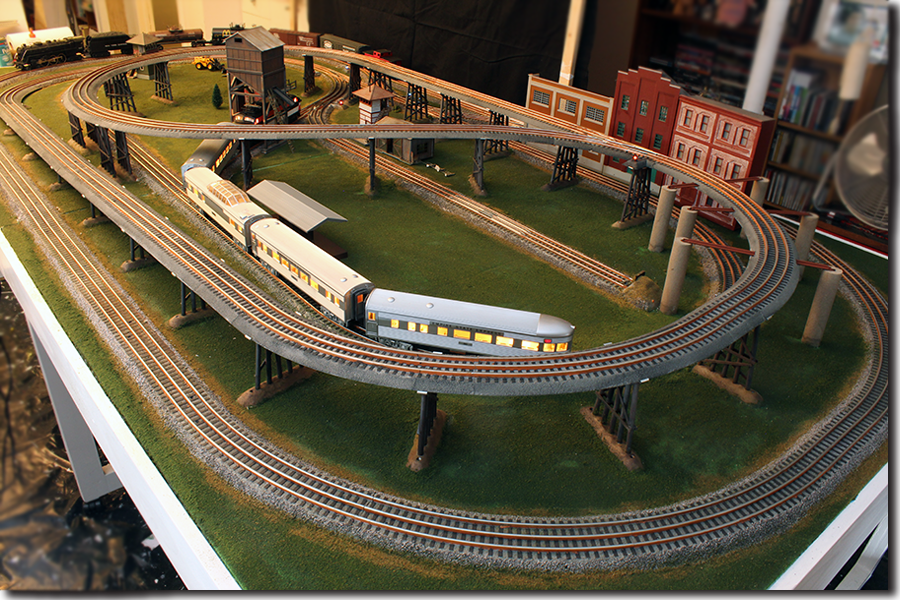
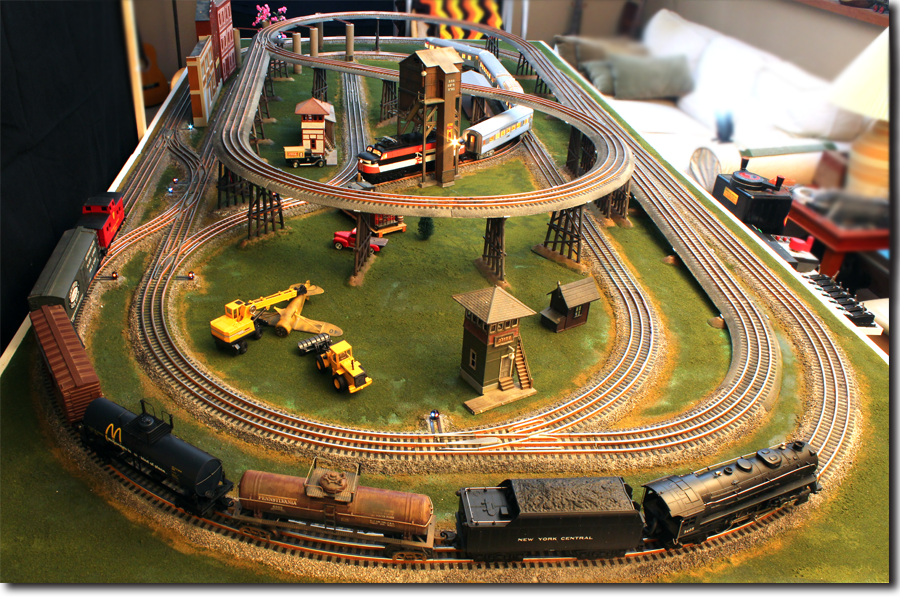
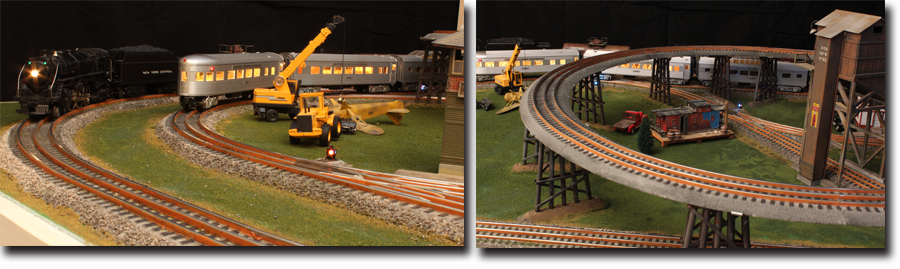
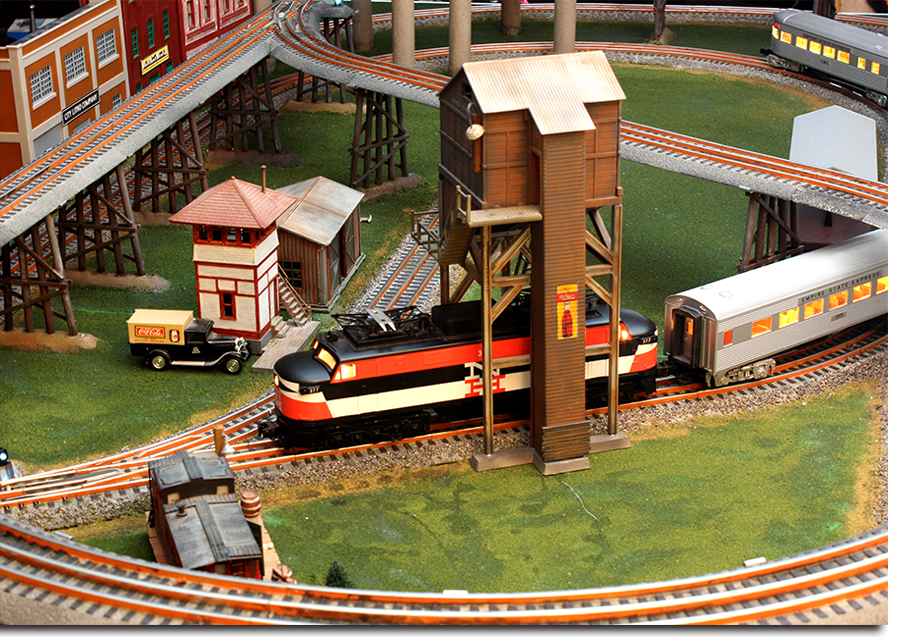
Complete Layout
Ground cover has been added, the ballast was washed with a black wash. We added some buildings and other items to show what can be done by the customer to enhance the look of the layout. The layout will be delivered with out buildings or any other items allowing the customer to add items at will.
Here are some images of the final layout: